Getting ready to add some ballast – experiments.
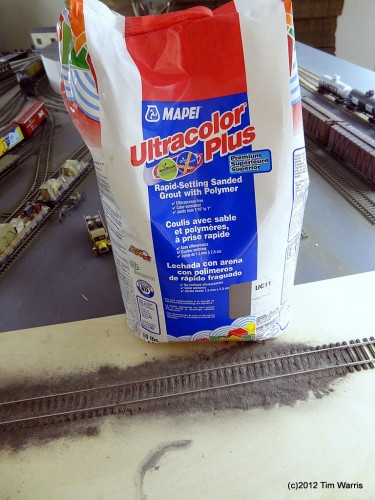
Testing grout for use as ballast.
After much deliberation I decided the next step in construction would be to start ballasting the trackwork. To be honest, I have been dreading this, as my experience with ballasting is it can make or break a layout. Getting the colours and texture right is critical to creating a good model of the original.
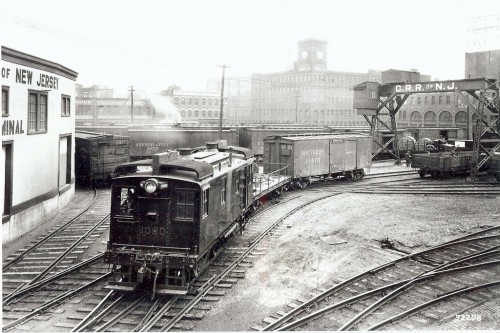
Studying the collection of images I have of the terminal, it is obvious that there was no “ballast” as we know it. It was pretty much all just dirt. To recreate this I don’t think many of the commercial ballasts available would work, so I am trying some alternatives.
Grout is an interesting material to try, as it is much finer that typical ballast, available in lots of colours, and also has the added bonus of being self adhesive…
Not wanting to experiment on the actual layout, I glued a length of flextrack I had on hand to some plywood to test with.
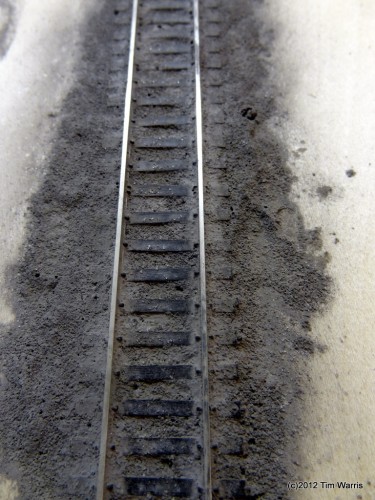
Grout goes on very powdery, almost like talc, but when wetted, turns a bit more grainy. I spread it in place using a brush, then gave it a pre-soak with isopropyl alcohol, followed with water, both applied using spray bottles. An earlier attempt with just water caused the liquid to just sit on top of the grout and not soak in. I was surprised just how much I had to soak it to get it to bond, again, an earlier attempt with a light application of water did not adhere.
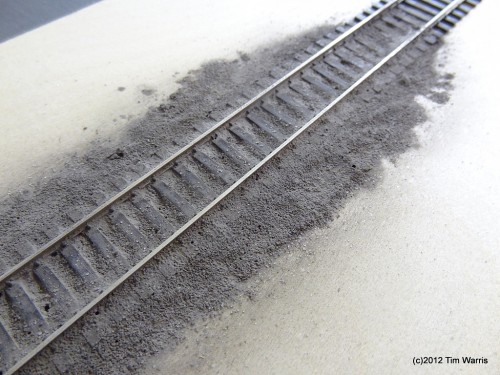
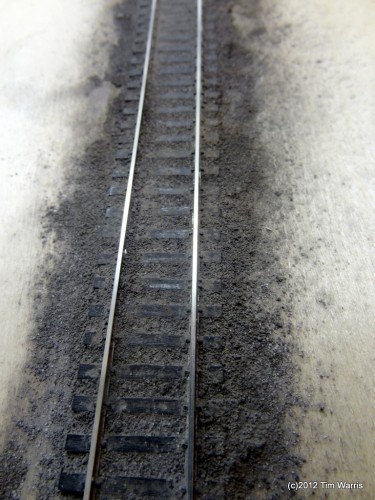
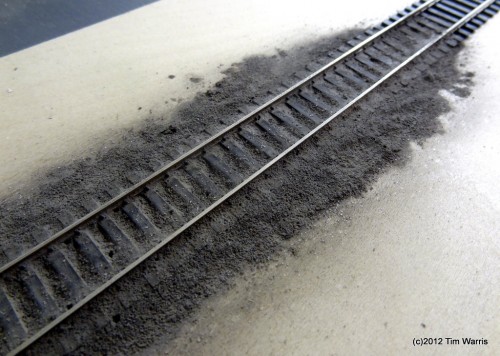
Above are a few shots of the results after drying overnight. The bond isn’t as good as I would like, so I will give it another shot with some diluted glue, which should make it pretty permanent.
The texture isn’t bad, but I am not sure if I am 100% happy with the look. Colour might be a bit dark as well.
Here are a couple of images of what I am trying to capture. Click on the images for a larger version….
Comments?
About the Author:
I'm your host, Tim Warris, a product developer in Port Dover, Ontario. Since March of 2007 I have been documenting the construction of the former CNJ Bronx Terminal in HO scale. For my day job, I design track building tools for Fast Tracks, a small company I own and operate. Fast Tracks makes it fast and easy to hand lay your own trackwork. Stop by our website to learn more!
Posted by: Tim | 03-20-2012 | 02:03 PM
Posted in: Ballast | Latest Posts | Track Construction | Weathering



I wonder if some very fine “dirt” (possibly ostensibly “N scale”) from eg. Arizona Rock & Mineral would work?
Hi Tim!
I have used grout on my harbor layout, too. I can forward some photos if you’re interested in seeing my results. I must say, I have mixed feelings about using it. I used black sanded grout, and like you observed, it went on VERY fine, but since it is grout, it sets up nice and holds things down. Mine however, got a white cast to some of it, which may have been caused by many things, I don’t know. I had always intended to go back over it with a wash of whatever to see if that would tone it down, I haven’t yet. I’ve had to do some track work that was already ballasted, and it came up with minimum effort, though it made a mess! I still think I will continue to use it when I get back to ballasting, and experiment further.
Why not try real dirt, sometimes the best way to model the real thing is to use the real thing, have a look around the area you live and see if there is any dirt that matches the color and collect some then sieve it, even fine sand might do the trick.
other than that there are lots of modelling products out there that look like dirt or fine sand, one product I like to use for dirt is Tamiya Soil Dark Earth Texture Paint, it also comes in light grey, grey and light sand however I’m not sure how this would go as ballast.
In watching the video of the real thing I would use N scale cinders mixed with various dirts and fine ballasts. It sure doesn’t look clean.
Also happy to see you back at it!
Tim, might be worth considering Pledge Future/Kleer floor polish as your ballasting ‘glue’
I apply mine neat from the bottle, using a pipette. It’s already ‘wet’, so soaks into the ballast nicely and gives a very, very good hold after a few hours, dries with a matt finish too.
For the ballast itself, looking at the images, it’s similar in appearance and texture to my own layout requirements – I opted for the finest N gauge ballast I could find, fixed with Kleer. Looks just about right.
Hi Tim,
Do you have any update on your ballast experiments?
Cheers,
Rene